By default, Google Analytics views will show information pertaining to the sum of all pages on the kent.ac.uk domain. To narrow down data to your department or interest you should apply a segment which acts as a filter to the data you are presented with. This will need to be applied each time you access a dashboard as the default settings will always revert to the overall segment.
Note: A segment should have been created and shared with you when you were initially set up with Google Analytics. If you can't find your segment listed and you have never been given a link to add this, please get back in touch with the person who set you up.
There is also a small section at the end that covers managing the date range you are querying data for. As with adjustments to segments, any preferred, custom date ranges will need to be applied each time you access your dashboard, otherwise you will simply view the default view of the past 30 days.
Step 1 - Open the Segment Menu
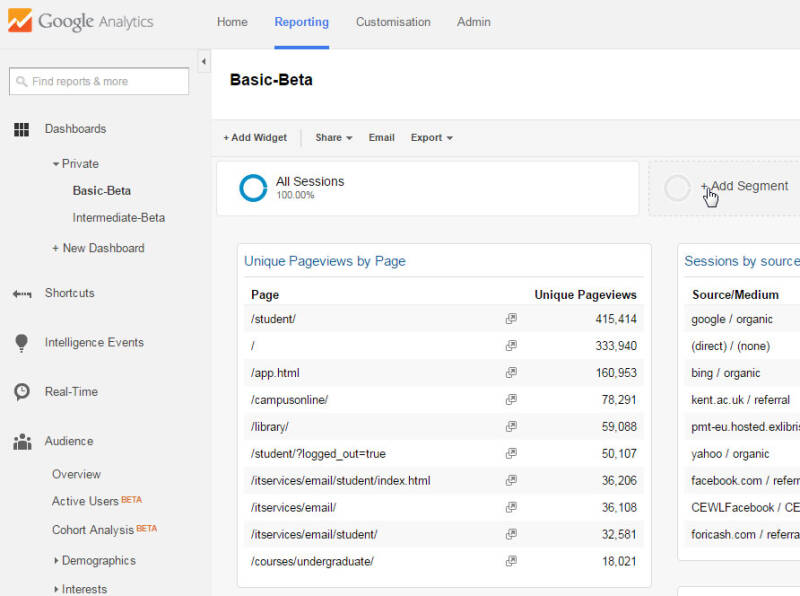
From inside your dashboard, near the top you will see a wide box that reads "All Sessions". This portion of the screen is dedicated to segment management. To add your department's segment in to the mix, click the "Add Segment" button to the right hand side of this.
Step 2 - Select Correct Segment
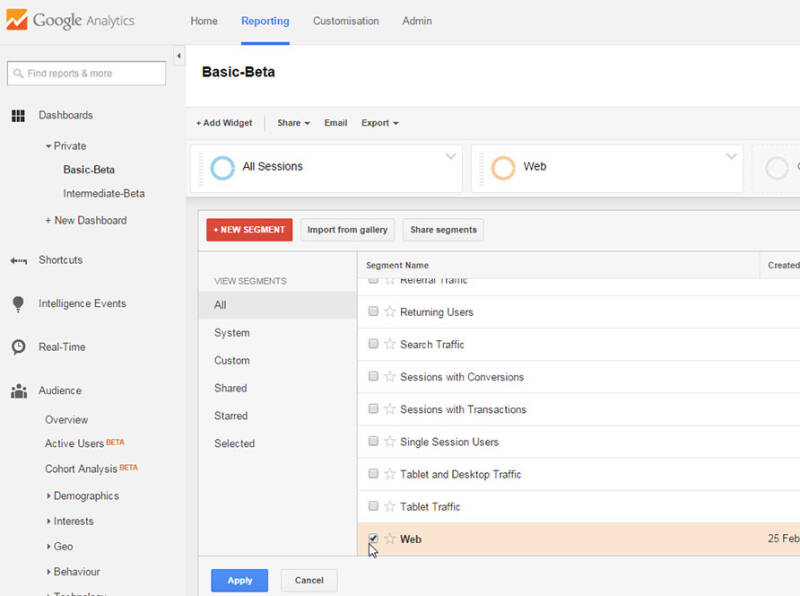
The above menu should immediately open. Firstly, uncheck the box next to "All Sessions". Now, scroll down and look for your segment of choice. As shown below, the default naming convention for sub-site segments is simply the relevant domain extension - in this case "web".
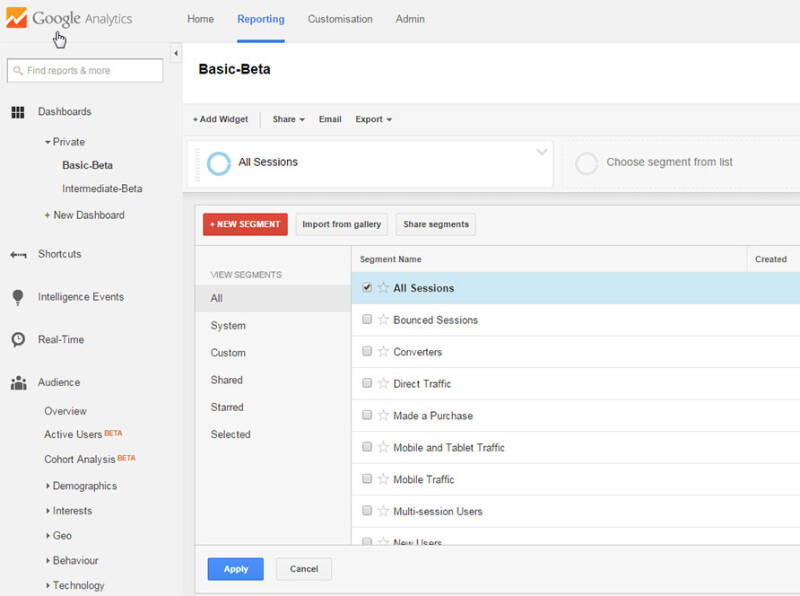
Select this and hit apply.
Complete - Segment Is Now Applied
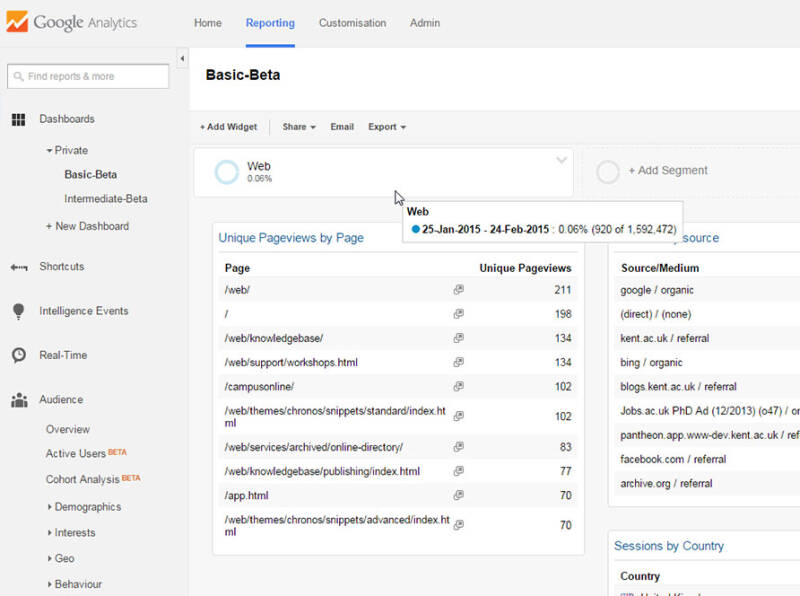
Data now shown on your dashboard's widgets should now only include that which is relevant to your segment. In some cases it may be useful to have more than one segment applied at one time. This can be simply achieved by following the above steps and selecting multiple options from the segment menu.
Removing Unwanted Segments
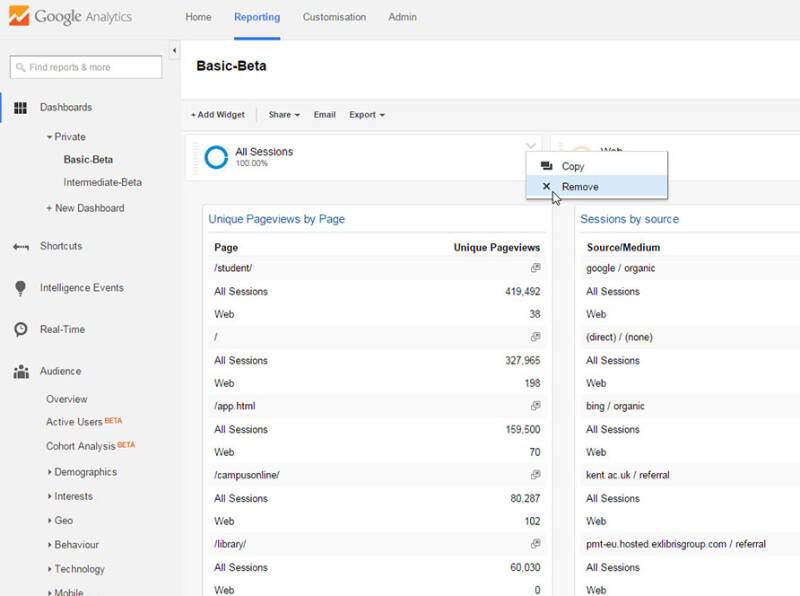
You may need to remove a segment from your dashboard, either to return to the default "All Sessions" view, or to remove a second segment that has been applied. This can be quickly done by clicking the arrow at the top right of your segment's button and clicking "Remove".
Date Ranges
In the top right hand side of the dashboard window, the date range of your current view is shown. By clicking this, the above menu appears which allows easy adjustment to whatever range is of interest - simply set out a custom range or select one of the options from the "Date Range" drop down and hit apply.

Segment list
Please ensure you click the segment link that was sent to you via email or find your website in the list below. Alternatively, if you would like to set it up yourself, please follow the instructions on the 'Creating a segment' article.
- Accommodation
- Architecture
- Catering
- CHSS
- CPP
- Finance
- Finance staff
- Finance student
- Graduate school
- Hospitality
- Human Resources
- Human Resources - Management Information
- Human Resources - Staff Information
- Jobs
- Kent on the Web
- Kent Sport
- KBS
- Physical Sciences
- Planning
- Planning Local
- Politics
- Politics Local
- School of Arts
- SMFA
- SMSAS
- Sports Sciences
- SSPSSR
- Tizard


